

Thinking about setting up your own creative space? It’s a big step, but totally doable. This guide is all about getting your digital studio ready to go, from the gear you need to making the space feel just right. We’ll cover how to make your setup work for you, so you can focus on making awesome stuff. A thoughtfully designed studio helps creators explore ideas, refine direction, and fully unlock their creative potential in a digital studio. Let’s get your creative vision rolling!
Key Takeaways
- Get the right gear: Cameras, lenses, and lights are your main tools for a digital studio.
- Set up your space thoughtfully: Make sure your studio is organized and comfortable for working.
- Learn lighting basics: Three-point lighting is a good starting point for great shots.
- Think about how you shoot: Posing models and framing your shots makes a big difference.
- Edit your work: Use software to make your photos look polished and develop your own style.
Equipping Your Digital Studio
Getting your digital studio set up is like gathering your paints and brushes before starting a masterpiece. It’s all about having the right tools ready to go. Think of this as the foundation for all the cool stuff you’re going to create. You don’t need the most expensive gear right away, but having a solid starting point makes a big difference.
Essential Cameras and Lenses for Your Digital Studio
Your camera is basically your eye in the studio. For most studio work, you don’t necessarily need the absolute latest model, but a good DSLR or mirrorless camera will serve you well. These cameras offer control over settings like aperture and shutter speed, which are super important for getting the look you want. When it comes to lenses, a versatile zoom like a 24-70mm is a great all-rounder. It covers a good range for different shots. A prime lens, like a 50mm, is also fantastic for its sharpness and ability to create a nice background blur, often called bokeh. Having a couple of these options means you can adapt to various shooting situations without constantly changing your position. Picking the right camera and lens combo is a big step towards making your creative vision a reality. You can find some great options for your setup at camera retailers.
Mastering Light: Essential Lighting Equipment
Light is pretty much everything in photography, especially in a studio. It shapes your subject and sets the mood. You’ll want a few different types of lights. Strobes, also known as flashes, give you a powerful burst of light, great for freezing motion and working with flashes. Continuous lights, like LED panels, are also useful because you can see exactly how the light will fall on your subject before you even take the picture. This makes them really good for beginners. Beyond the lights themselves, you’ll need light modifiers. These are things like softboxes, umbrellas, and reflectors. They change the quality of the light – making it soft and diffused, or hard and direct. Having a mix of these will give you a lot of control over how your images look.
Backdrops and Props for Creative Expression
Backdrops and props are your supporting cast. The backdrop creates the environment for your subject. You can go with classic white or black for a clean look, or experiment with different colors and textures to add personality. Think about what kind of mood you want to convey. Props are where you can really have some fun and add narrative to your images. A simple chair, a vintage suitcase, or even a few flowers can completely change the feel of a photo. Just remember to keep them relevant to the overall theme or story you’re trying to tell. Don’t let them overpower your subject, but use them to add interest and depth. It’s all about finding that balance to make your images pop.
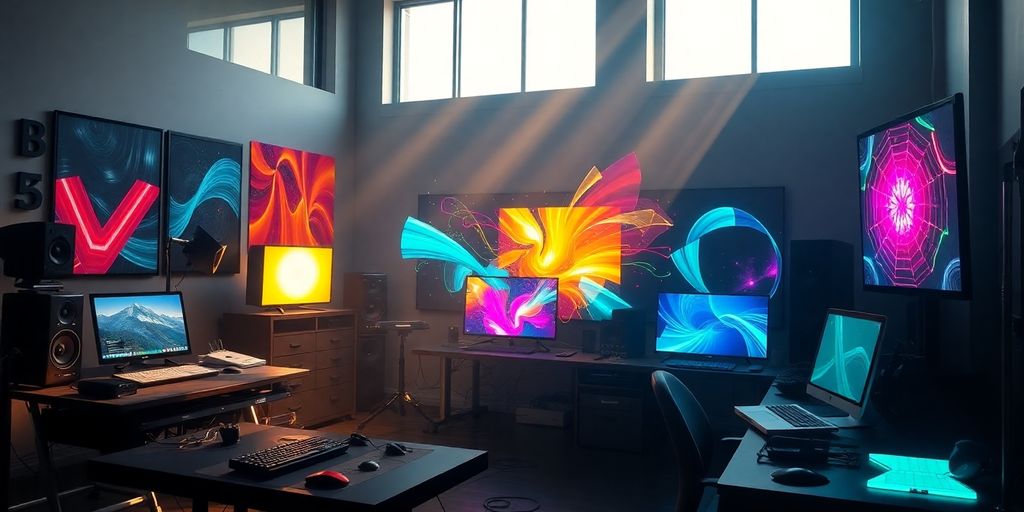
Setting Up Your Digital Studio Space
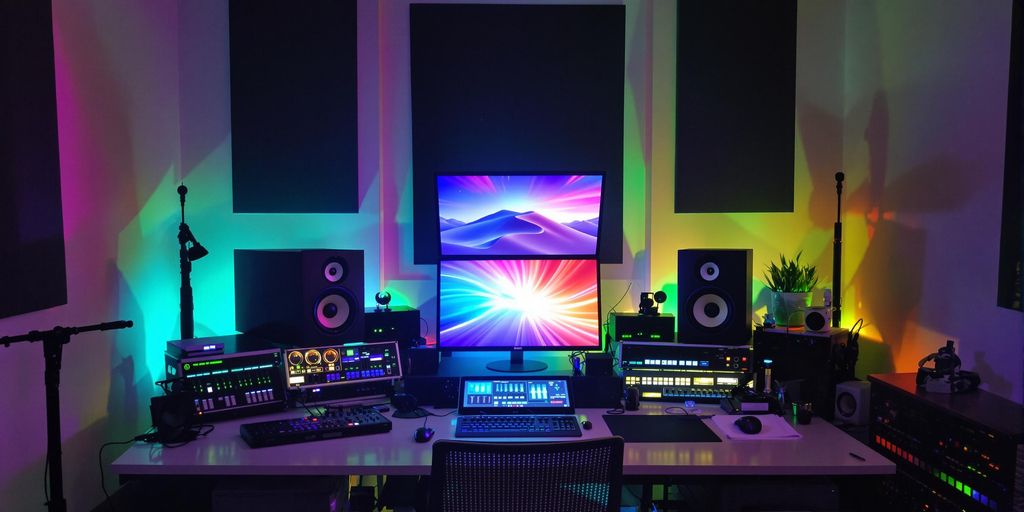
Your digital studio space is more than just a place to put your computer; it’s your creative command center. Making sure it’s set up right can really change how you work. Think about it like this: if your kitchen is a mess, cooking is going to be a chore, right? Your studio is the same way. A good setup helps you focus and keeps things flowing smoothly.
Optimizing Your Workspace for Productivity
To get the most out of your time, you need a workspace that works for you. Start with the basics: a comfortable chair is a must. You’ll be spending a lot of time here, so something ergonomic that supports your back is a good idea. An adjustable desk is also great, letting you switch between sitting and standing. This can help with fatigue and just generally make the day better.
- Cable Management: Nothing kills productivity like a tangled mess of wires. Use ties, sleeves, or clips to keep everything neat. It looks better and makes it easier to find what you need.
- Desk Organization: Keep your essential tools within reach. Use drawer organizers or small shelves for pens, hard drives, or other bits and bobs. A clean desk means a clear mind.
- Monitor Placement: Position your monitor at eye level. This helps prevent neck and eye strain. A monitor stand can do wonders here. If you use multiple monitors, arrange them so you don’t have to twist your neck too much.
A well-organized space reduces distractions and makes it easier to get into a creative flow. It’s about creating an environment where your ideas can come to life without unnecessary friction.
Creating an Inspiring Atmosphere
Beyond just being functional, your studio should feel like a place you want to be. It’s where your creativity lives, so make it reflect that.
- Personal Touches: Add things that inspire you. This could be artwork you love, photos, plants, or even just a color scheme that makes you happy. Surround yourself with things that spark joy and motivation.
- Good Lighting: Natural light is fantastic if you can get it. If not, make sure you have good artificial lighting. An adjustable desk lamp is helpful for focused work, and ambient lighting can set a mood. Avoid harsh overhead lights if possible.
- Sound: Consider what you listen to while you work. Whether it’s music, podcasts, or just quiet, make sure your audio setup is comfortable and doesn’t add to stress. Good headphones can be a lifesaver if you share your space.
Think about your studio as a personal sanctuary. When it feels right, you’ll find yourself wanting to spend more time there, and that’s when the best work happens.
Mastering Lighting Techniques in Your Digital Studio
Getting the lighting right in your studio is a big deal. It’s not just about making things visible; it’s about shaping the mood, drawing attention to your subject, and really making your photos pop. Think of light as your primary tool for sculpting the image. You can use it to create drama, softness, or anything in between. It’s a bit like painting, but with photons instead of pigment.
The Three-Point Lighting Setup for Impact
This is a classic for a reason. It’s a solid starting point for most studio setups. You’ve got your key light, which is the main light source, usually placed to the side of your subject. Then there’s the fill light, which is softer and placed on the opposite side to fill in those harsh shadows the key light creates. Finally, the backlight, often called a rim light, is placed behind the subject, usually higher up, to separate them from the background and give them a nice outline. It really makes your subject stand out.
- Key Light: The main light source, defining the primary illumination.
- Fill Light: Softer light used to reduce the contrast created by the key light.
- Backlight (Rim Light): Placed behind the subject to create separation and a subtle edge highlight.
Utilizing Light Modifiers for Artistic Effect
Modifiers are where you really start to play with the quality of light. A softbox, for instance, gives you that soft, diffused light that’s great for portraits because it wraps around the subject gently. On the other hand, a snoot or a grid can focus the light into a tight beam, perfect for highlighting specific details or creating a spotlight effect. Experimenting with these tools is how you find your unique look. You can even use something like a beauty dish to get a nice balance between soft and hard light. It’s all about controlling the spread and intensity.
Enhancing Images with Props and Backdrops
Props and backdrops aren’t just background filler; they’re part of the storytelling. A simple, solid-colored backdrop can keep the focus squarely on your subject, while a textured or patterned one can add visual interest and context. Props can add personality, suggest a narrative, or simply provide something for your subject to interact with. Think about what story you want to tell. Do you need a vintage chair for a classic portrait, or maybe some simple flowers to add a touch of color? It’s about adding layers to your image without making it too busy.
Choosing the right combination of props and backdrops can really tie your entire studio setup together, making the final image feel cohesive and intentional. It’s not just about the lighting; it’s the whole package.
Posing and Composition for Studio Photography
Getting the pose and composition right is where your creative vision really comes to life in the studio. It’s not just about pointing the camera; it’s about guiding your subject and framing your shot in a way that tells a story or evokes a feeling. Think of it as painting with your camera, but instead of brushes, you’re using light, shadow, and the arrangement of elements within your frame.
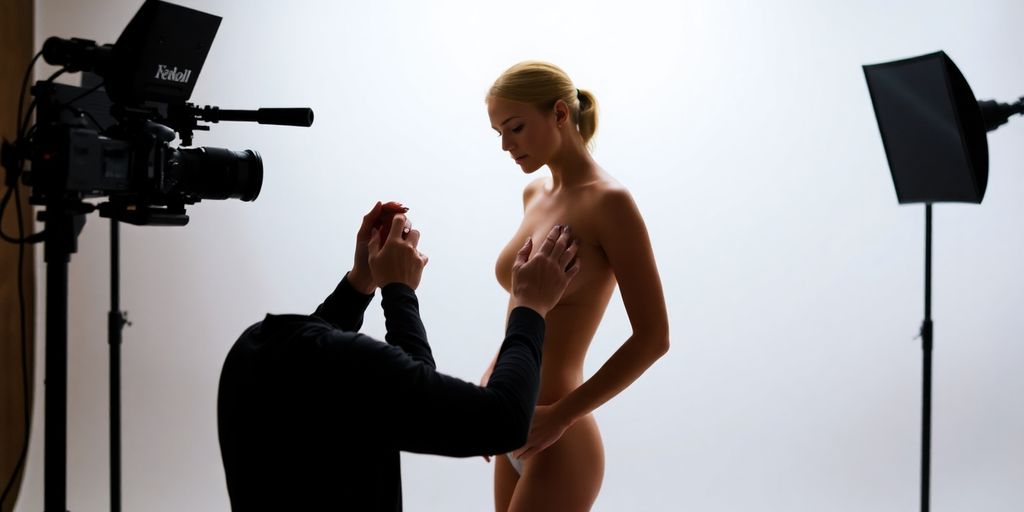
Effective Posing Techniques for Models
Making your subject feel comfortable is the first step to a great pose. Talk to them, explain what you’re trying to achieve, and don’t be afraid to demonstrate. Sometimes a simple adjustment, like turning a hand slightly or tilting the head, can make a big difference. We want to capture natural expressions and flattering lines, not stiff, awkward stances. Consider how the body interacts with the light – a slight turn can create dramatic shadows, while a relaxed posture often feels more approachable.
- Communicate clearly: Explain the desired mood and pose.
- Encourage natural movement: Guide, don’t force.
- Pay attention to hands: They can often betray tension.
- Use the environment: Have the model interact with props or the backdrop.
The goal is to make the pose look effortless, even if it took some direction to get there. It’s about capturing a moment that feels authentic to the person you’re photographing.
Composition Strategies for Compelling Images
Composition is how you arrange the visual elements in your photograph. It’s the structure that holds everything together and guides the viewer’s eye. There are a few classic approaches that work really well in a studio setting.
- Rule of Thirds: Imagine your frame divided into nine equal sections by two horizontal and two vertical lines. Placing your subject or key elements along these lines or at their intersections often creates a more balanced and interesting image. It’s a good starting point, but don’t be afraid to break it.
- Leading Lines: Use lines within the scene – perhaps the edge of a backdrop, a prop, or even the subject’s arm – to draw the viewer’s eye towards the main point of interest.
- Negative Space: Don’t feel the need to fill every inch of the frame. Empty space, or negative space, can help your subject stand out and give the image a sense of calm or isolation, depending on the context.
- Symmetry and Patterns: Sometimes, a perfectly symmetrical composition or a repeating pattern can be very striking, especially in a controlled studio environment. This can create a sense of order and visual impact.
Refining Your Work: Editing in the Digital Studio
So, you’ve captured some great shots in your studio. Now comes the part where you really make them shine. Editing is where your creative vision truly comes to life, transforming good photos into something special. It’s not just about fixing mistakes; it’s about adding your unique touch and telling a story.
Leveraging Software Tools for Post-Processing
Your editing software is your digital darkroom. Programs like Adobe Lightroom or Capture One give you a lot of control. You can adjust exposure, bring out details in shadows, and make sure your colors look just right. Getting the white balance correct is a good first step to ensure accurate colors. It’s also where you can start to clean up any distractions, like dust spots or minor blemishes. Learning the basics of these tools can really speed up your workflow, allowing you to achieve professional-grade photo edits in under 15 minutes per image using Photoshop. It’s all about finding a workflow that suits you.
Developing Unique Editing Styles
This is where you can really let your personality show. Think about the mood you want to create. Do you prefer bright and airy images, or something more dramatic and moody? You can experiment with different color palettes, contrast levels, and sharpening techniques. Maybe you like a vintage look, or perhaps a clean, modern feel. Don’t be afraid to try new things and see what works. Developing a consistent style takes practice, but it’s what makes your work stand out.
Your editing style is like your signature. It’s how people will recognize your work even without seeing your name. Play around with presets, but also learn how to tweak them or create your own from scratch. This personal touch is what turns a good photo into your photo.
Showcasing Your Digital Studio Creations
So, you’ve poured your heart and soul into building your digital studio, mastering your gear, and creating some truly amazing work. Now what? It’s time to let the world see what you’ve been up to. Your portfolio is basically your visual resume, the first impression potential clients or collaborators will get of your talent and style. Making it shine is pretty important.
Building a Powerful Online Portfolio
Think of your online portfolio as your digital storefront. It needs to be clean, easy to navigate, and, most importantly, showcase your absolute best work. Don’t just dump everything in there; curate it. Select pieces that represent the kind of projects you want to attract. A well-organized portfolio on a platform like Behance can really make a difference. Make sure your contact information is easy to find, and consider adding a short bio that tells people a bit about you and your creative approach.
Networking and Continuous Learning
Creating great work is only half the battle. Getting it seen and continuing to grow is the other. Engage with other artists online and in person. Go to workshops, join photography groups, and share your progress. The creative community is a supportive one, and you can learn so much from others. Plus, you never know where your next big opportunity might come from. Keep practicing, keep experimenting, and never stop learning new techniques or exploring different styles. It’s how you stay relevant and keep pushing your own creative boundaries.
Keep Creating, Keep Growing
So, you’ve got the gear, you’ve learned the techniques, and you’re ready to make some amazing photos. Remember, your digital studio is more than just a space with lights and cameras; it’s where your ideas come to life. Don’t be afraid to experiment, try new things, and really find your own style. The best way to get better is to just keep shooting. Keep learning, keep playing with your equipment, and most importantly, have fun with it. Your creative journey is just getting started. When creativity aligns with business goals, a digital studio becomes a powerful tool for building a stronger brand presence.
Frequently Asked Questions
What kind of camera and lens should I get for my studio?
Think of your camera as your main tool. A DSLR or mirrorless camera is a good start. You’ll also want a versatile lens, like one that can zoom in and out (a 24-70mm) or a prime lens (like a 50mm) that gives you a fixed, clear view. These help you capture sharp, beautiful images.
What are the most important lighting tools for a studio?
Lighting is super important! You’ll need lights that can either flash (strobes) or stay on (continuous lights). Also, get different light covers, called modifiers, like softboxes or umbrellas. These help shape the light to make your photos look just right, whether soft and dreamy or bright and bold.
What do backdrops and props do in a studio shoot?
Backdrops are like the background paint for your photos. You can get plain ones in different colors or ones with cool textures. Props are objects you add to the photo, like a chair, a hat, or a flower. They help tell a story and make your pictures more interesting.
How should I set up my studio space to be productive?
Setting up your space means making it work for you. Make sure you have enough room to move around and set up your lights and camera. Keep it tidy so you can focus. Maybe add a comfy chair or some nice music to make it a pleasant place to create.
What is the three-point lighting setup?
Three-point lighting is a common setup. It uses three lights: one main light to light up your subject, a second light to soften shadows, and a third light from behind to make your subject stand out from the background. It’s a great way to make portraits look really good.
How do I edit my photos after shooting in the studio?
After you take your photos, you use computer programs like Adobe Lightroom or Photoshop to make them even better. You can fix colors, adjust brightness, and remove small mistakes. It’s like adding the finishing touches to a painting. You can also develop your own unique look or style for your photos.